jeudi 16 mars 2017

Celebrating three years in ARDIA. A year for creating Microsoft - Tunisian .NET Community

18 March 2014 was my first day in ARDIA, another new experience for me after more than 4 years in a previous company.
Three years is considered a significant experience with ARDIA, where I learned a lot.
16 March 2016 I create Tunisian.NET Community to mount skills beginners.NET developers (Microsoft Technologies).
Some advice:
Don’t be afraid of being yourself! Believe in your ability whatever they said!
If you love what you're doing no matter what comes your way, or what problems you run into, you're going to be resilient and get through it.
Let your passion drive your career map direction. If you just started your career, do something that inspires you and gives you a sense of purpose.
As women, particularly if you have children that are on the cards, you have to expect that your career will take unexpected turns, and your priorities may shift.
I'm a mother of a wonderful kid called Rayen and an inspired husband. It's about the legacy I leave my kid, I hope to make him and her father proud and to be an example to them of what can be achieved with passion, support, tenacity, a lot of work and some luck for a unique goal is to make the world a better.
LOT OF “INSPIRATION. MOTIVATION and PASSION.”
Mastering a skill or technology is not as easy as we thought especially in a fast-changing industry.
I'm proud to be a woman, wife, and mother, face these challenges, sometimes I'm asking myself why I love programming? The answer is simple, I'm able to learn every day new technologies, I can directly impact someone's life by providing a solution, and the puzzles we solve translated into problems solved for others, I'm able to create beautiful products, solve problems and learn new tricks keeps. It is simply exciting!
A personal project reference for me that I created alone piece by piece: http://www.allotabib.net/
Writing blogs, recording some videos inspires me to be a better programmer and a better communicator, for this reason, I created my blog: http://hamidarebai.blogspot.it/ and a YouTube Channel: https://www.youtube.com/channel/UC31YxrncpmMma2_UuaWxkKw
I believe that designing, technology, and programming is almost like art and as creative not up to all. When I create components, modules, classes, entities, layers, then slowly build them up to come together and play well together.
I’m always in the phase of "The growth mindset" because I believe that my ability and intelligence can be developed and refined."
Next days, I have a lot of changes in my career with not only with ARDIA but with Microsoft.
I Say thank you for all peoples that believed in me as a technical woman involving year after year, and I said thank you to people that they tried to breaking my wing and decrease my technical value, this let me always be strong and confident.

mercredi 15 mars 2017

Convert from 1.x to Angular 2.0 - Part 2

SERVICES 

Angular 1.x

Angular 2


In Angular 1.x, if we want defining a service we have 5 different ways : Factory,Service, Provider,Constant and Values.

But in Angular 2, we use class that is the only way to define a service.
Example :

Angular 1.x

angular.module('app').service ('ClientService', ClientService);
function ClientService () {
this.getClients = function () { return
      [
        {id: 1, name: 'Hamida'},
        {id: 2, name: 'Mohamed'},
       {id: 3, name: 'Rayen'}
      ];
   }
}

Angular 2

import {Injectable} from '@angular/core';
@injectable()
export class ClientService {
getClients = () => [
      {id: 1, name: 'Hamida'},
      {id: 2, name: 'Mohamed'},
      {id: 3, name: 'Rayen'}
  ];
}
And once defined, you need to register it with your main component using provider.
Notice, @Injectable() is added to service class.

Dependency Injection

One of the advantage of Angular is Dependency Injection (DI). With Angular 2 DI is there but now there is a different way to inject dependencies. As everything is class in Angular, so DI is achieve via constructor.

Registering Services with the Injector

Angular 1.x

angular.module('app').service ('ClientService', ClientService);
function ClientService () {
this.getClients = function () { return
      [
        {id: 1, name: 'Hamida'},
        {id: 2, name: 'Mohamed'},
       {id: 3, name: 'Rayen'}
      ];
   }
}
ClientService ==> REGISTRATION

Angular 2

@NgModule({
imports: [BrowserModule, FormModule],
declarations : [ClientComponent],
providers : [ClientService],
bootstrap :   [ClientComponent],
})
export class AppModule {}

ClientService==> REGISTRATION

Dependency Injection

Angular 1.x

angular.module('app').controller('ClientController', ClientController);
ClientController.$inject = ['ClientService'];
function ClientController (ClientService) {
    var vm= this;
    vm.title = 'services';
    vm.clients = ClientService.getClients();
}

or angular.module('app').controller('ClientController', function (ClientService));

Angular 2

@Component ({
moduleId: module.id,
selector: 'my-clients',
templateUrl: 'client.component.html',
})
export class ClientComponent {
clients = this.clientService.getClients();
constructor(private clientServiceClientService) {}
}

ROUTES

In Angular 1.x, we use $routeProvider.when() to configuring routing. But in Angular 2, @RouteConfig{(...}) is used. ng-view present in Angular 1.x is replaced with <router-outlet>

Angular 1.x

var app = angular
        .module("MyModule", ["ngRoute"])
        .config(function ($routeProvider) { 
            $routeProvider 
              .when("/home", { templateUrl: "home.html", controller: "homeController" })
              .when("/client", { templateUrl: "client.html", controller: "clientController" }) 
        })
       .controller("homeController", function ($scope) {
            $scope.message = "Home Page"; 
        })    
       .controller("clientController", function ($scope) {
             $scope.clients = ["Hamida", "Mohamed", "Rayen"]; 
       }) 

Angular 2

import { Component } from 'angular2/core';
import { RouteConfig, ROUTER_DIRECTIVES, ROUTER_PROVIDERS } from 'angular2/router';
import { ClientComponent } from './client/client.component';
import { ClientService } from './Client/Client.service';
 
@Component({
  selector: 'my-app',
  templateUrl: 'app/app.component.html',
  directives: [ROUTER_DIRECTIVES],
  providers: [
    ROUTER_PROVIDERS,
    ClientService
  ]
})
@RouteConfig([
  { path: '/home', name: 'Home', component: HomeComponent, useAsDefault: true },
  { path: '/client', name: 'Client', component: ClientComponent },
])
export class AppComponent { }

We import Routing because it's a separate module.
 And we have more configurations to make routing work, one is adding [ROUTER_DIRECTIVES] as directive and other is to add ROUTER_DIRECTIVES in providers list.

HTML Page is like this :
<ul>
  <li><a [routerLink]="['Home']" href="">Home</a></li>
  <li><a [routerLink]="['Client']" href="">Client</a></li>
</ul>
ng-href is also replaced by [routerLink]
Angular 2 implements webstandards like components and it’s provide better performance than Angular 1.
To RECAP : we have 7 Keys to compare :

Next article will describe more Angular 2 Essentials: Modules, Components, Templates...


mardi 14 mars 2017

Convert from 1.x to Angular 2.0

- Angular 1.x was not built with mobile support But in Angular 2 we have a Support for native mobile rendering in Android and iOs.
- Angular 1.x is in JavaScript but Angular 2 provides more choice for languages : ES5, ES6, TypeScript or Dart to write Angular 2 code.


- In Angular 1.x we work using controllers and $scope but they doesn't used anymore in  AngularJS 2
This is an example : 

We will use TypeScript for convertion.

Angular 1.x Controller

var myApp = angular
   .module("myModule", [])
   .controller("clientController", function($scope) {
     var clients = { firstname: "Hamida", lastname: "Rebai", Reference: 12 };
     $scope.clients = clients;
}); 

Component-Based

Angular 2 Components using TypeScript

import { Component } from 'angular2/core';

@Component({
  selector: 'clientsdata',
  template: '
    <h3>{{clients.firstname}}</h3> '
})

export class ClientComponent {
  clients = { firstname: "Hamida", lastname: "Rebai", Reference: 12 };
}


In template  we can call a html page like this :
 templateUrl: './app.component.html',
And we can mention the Css Class related to this page like this :
styleUrls: ['./app.component.css']
@Component annotation adds the metadata to the class and it's a new word in Angular 2.
Controllers to Components

Directives

Directive ng-app 
Directive ng-app designates the root element in an application, it's placed usually in root DOM element like : <body> or <html> tags.

Angular 1.x

<script>
   angular.element(document).ready(function() {
      angular.bootstrap(document, ['myApp']);
   });
</script>
Angular 2
We can Say Bye Bye ng-app because we will bootstrap angular only with code :
import { bootstrap } from 'angular2/platform/browser';
import { ClientComponent } from './client.component';
 
bootstrap(ClientComponent);
bootstrap function in our case is used to start component, it's also the root (parent) component of your AngularJS App.
Structural directives 

Angular 1.x structural directives

<ul>
   <li ng-repeat="client in clients">
     {{client.firstname}}
   </li>
</ul>
<div ng-if="clients.length">
   <h3>You have {{clients.length}} clients.</h3>
</div>

Angular 2 structural directives

<ul>
  <li *ngFor="#client of clients">
    {{client.firstname}}
  </li>
</ul>
<div *ngIf="client.length">
  <h3>You have {{client.length}} clients.</h3>
</div>
We can use the word let instead of #
<li *ngFor="let client of clients"> 
Structural Built-In Directives
==>Asterisk(*) sign is used as prefix for structural directives
==> For filters we keep using the same syntax (|) the pipe.


Removes the Need for Many Directives

Angular 1.x


<div ng-style="vm.strory ? {visibility :'visible' } : {visibility :'hidden' }>
<img ng-src="{{vm.imagePath}}">
<br/>
<a ng-href="{{vm.link}}">
{{vm.story}}
</a>
</div>

Angular 2 

<div [style.visibility] = "story ? 'visible' : 'hidden' ">
<img [src] = "imagePath">
<br/>
<a [href] = "link"> {{story}}</a>
</div>
==>Angular 2 uses camelCase syntax for built-in directives. For example, ng-class is now ngClass and ng-model is now ngModel.

Interpolation

Angular 1.x

<h2> {{vm.client.firstname}}</h2>
vm is the context !

Angular 2 

<h2> {{client.firstname}}</h2>

1 Way Binding

I Angular 1.x, ng-bind is used for one way data binding, but with Angular 2 it is replaced with [property], where property is valid HTML DOM element property.

Angular 1.x

<h2 ng-bind="vm.client.firstname"></h3>

Angular 2 

<h2 [innerText]="client.firstname"></h3>
<div> [style.color] = "color">{{client.firstname}}</div>
==> Any HTML element property ! one way data binding is achieved via wrapping the properties with square brackets.

2 Way Binding

In Angular 1.x, ng-model is used for two way data binding, but with Angular 2 it is replaced with [(ngModel)].

Angular 1.x

<input ng-model="client.firstname"></input>

Angular 2 

<input [(ngModel)]="client.firstname"></input>

Event Binding

For events, parentheses is used and for properties, square brackets are used. 

Angular 1.x

<button ng-click="vm.log('click')" ng-blur="vm.log('blur')">OK </button>

Angular 2 

<button (click)= "log('click')" (blur) = "log('blur')">OK</button>

Removes the Need for Many Directives ==> Next ARTICLE :) 

lundi 13 mars 2017

Create an Angular 2 and .NET Core application using Visual Studio 2017


Angular 2 and .NET Core are new technologies making revolution in the programming. It's a Storm for web and .NET developers that let them working using flexible and easier technologies.
Angular 2 is a next generation cutting-edge cross-platform user interface framework build to create web applications.
.NET Core is a backend framework from Microsoft cross-platform so it is now available on Windows, Mac and Linux.
These two technologies  was used independently of each other, but now, they are combined together to build applications for any client/server platform. (frontEnd and Backend side).

The best way to get started learning Angular 2 and TypeScript is to clone an application starter, a minimalist Angular 2 app that has the full set up for Angular 2, with TypeScript and the module loader.

In Visual Studio 2015, we found a lot of samples to clone, to start but after the launch of Visual Studio 2017, creating Angular project is more easier.


  1. Prerequisite
  2. Install the templates
  3. Create the application
  4. Get ready !

Prerequisite

  • Visual Studio 2017 installed 
  • Version of the .NET Core SDK installed 
  • NodeJS version 6 or later


Install the templates

Open up a command prompt and type the following.

dotnet new --install Microsoft.AspNetCore.SpaTemplates::*


Create the application

To create your new Angular2 and .NET Core app, change directory to an empty folder, then type :

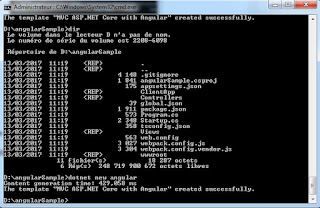
dotnet new angular

Get ready !

The video to learn easier :


mercredi 8 mars 2017